
- How to easily take screenshots in Windows 10 & 11: Use the keyboard shortcut WINDOWS key + SHIFT + S to open a snipping tool. Hold down the mouse and drag the desired section. Let go - the screenshot is now created. Paste it into apps with CTRL + V or click on the pop-up to edit and save it.
- Screenshot in ALL Windows versions (10, 11 and older like Win 7, 8, XP): Press the PRINT key on the keyboard to capture the entire screen. Open the pre-installed Paint app and insert the screenshot by pressing Ctrl + V. Save the file to the desired location.
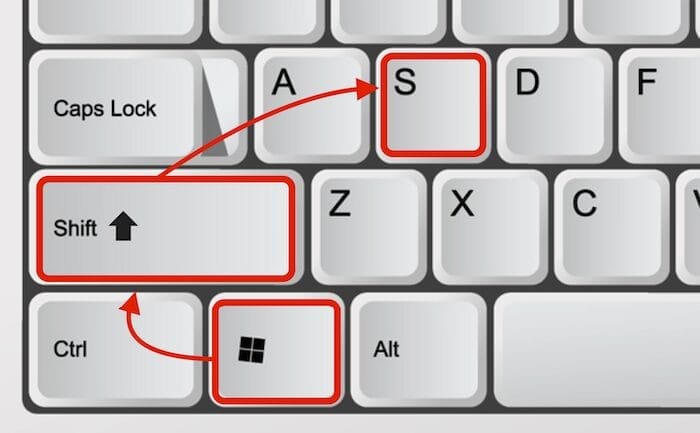
- Screenshots on the laptop: Use the PRINT key (PrtSc) - sometimes you have to press Fn + PRINT due to the laptop keyboard layout. With Windows + PRINT some laptops save the screenshot directly in the image folder. In Win 10 & 11, you can also use Windows + SHIFT + S to access the snipping tool for windows & co (see image above).
- Start video screen recording (screencast): For a screen capture in Windows 10 & 11, simply press the keys Windows + G. The built-in Xbox Game Bar starts. Now click on "Record" and create screen recordings of your PC or laptop.
View now: The best free & professional tools for screen clipping.
Below you will find detailed screenshot instructions for the Microsoft operating system - and the best third-party snipping tools.
Quick overview:

How do I take a precise screenshot on Windows-PC in a flash?
With a screenshot shortcut or built-in snipping tool that offers advanced options such as a screenshot section?
We will answer this most important question right away - before the detailed screenshot-under-Windows instructions for all versions below...
Create screenshot in Windows (all versions)
Hold down the keys WINDOWS, SHIFT + S . The snipping tool will now start in Windows 10 and 11. Hold down the mouse button and drag a screenshot section. Or select how you want to cut out the screenshot in the menu at the top: rectangular, free, from the window or full screen. Then save. Done!

The following key combinations work in all versions such as Windows 11, 10, 8, 8.1, 7 and XP:
Press the PRINT key to take a screenshot of the entire Windows screen. Then open a program such as Word, PowerPoint or Outlook and paste the screenshot with Ctrl + V ("Paste") - from here you can edit it further or share it.
If you hold down WINDOWS + PRINT, Windows saves the image directly to the screenshot directory on the hard disk under /images/screenshots (or /images/screenshots).
Some PC keyboards offer a special button in the form of a camera symbol, here in comparison with the "normal" press button on a laptop:


Once you have pressed this button, the screenshot is saved temporarily and you can use it further - for example in Microsoft Paint or Word ("Edit/Paste" or CTRL+V).
Shortcut and snipping tool (video tutorial)
This video clearly shows how to take screenshots with "classic" shortcuts and with the Snip & Sketch (new snipping tool) under Windows 10:
But we have even more in store - we document many more techniques, tricks and snipping tools for taking screenshots on your PC in this article.
Screenshots under Windows 10, 11, 8, 7, XP and before?!
Would you like to become a screenshot pro?
Are you looking for the best tricks for screenshots for Windows?
Then be sure to read on: For all PC users, we have created perhaps the most comprehensive screenshot guide of all time.
With how-tos for (almost) all versions of the Microsoft operating system.
In this article, we reveal how to take screenshots under Windows 10 and Windows 11 using the common keyboard shortcuts and how to use the popular snipping tool.
How? Are you still using Windows 8, 8.1 or even 7?
No matter which Microsoft operating system you are currently using - below you will find the current "best practices" and screenshot programs that are really good.
Or you can take a nostalgic look way back at the snipping tools of Win XP and Vista.
This article also documents the history of the Windows screenshot... ("Oh yes, that's how I used to take screenshots on Dad's first ALDI PC. He used to take screenshots of the Windows monitor with his analog SLR camera..." 📸📺😆 No joke, that's how it used to be done: Nintendo even created this guide in 1988).

Create screenshot in Windows 10
Now it's time to get down to business - we start with Windows 10, currently the most widely used version of Microsoft's operating system: In the following instructions, we will show you step by step how to take a screenshot with Microsoft Windows 10 with and without cropping.
Let's go!
Shortcut for the new snipping tool in Windows 10 (screenshots with cropping)
In Windows 10, there is a special tool or a pre-installed app for creating screenshots.
In earlier versions (before 2018) it was called Snipping Tool, in later versions of Windows 10 it was replaced by Snip & Sketch (cutting and sketching).

You can call up the Snip & Sketch app with a shortcut via WINDOWS+SHIFT+S:
- While holding down the WINDOWS key, tap SHIFT (also known as "Shift") and S. A bar will then appear at the top of the screen (see screenshot above)
- In the bar at the top, Cut rectangle is preselected. You can now draw a section of your choice by holding down the left mouse button and releasing it to save it. Use the second icon in the Cut out freehand bar to draw a section freehand. With the third icon Cut window, the tool captures individual windows, such as error messages or simply a browser window with an important message snippet that you want to share. And the last and fourth icons simply capture the entire screen in Windows 10.

3. If you release the mouse pointer, this notification appears in the bottom right-hand corner of Windows 10:

4. Click on this notification, Cut and sketch appears and you can edit the section of the screen immediately:

5. This allows you to highlight areas with a brush, paint text yellow with a marker or crop parts of the screen. The symbols above are self-explanatory. By clicking on New you can also create a new screenshot if you don't like the old photo.
Create screenshot with timer (seconds)
Some events on the screen are not so easy to photograph, such as when you capture something at a specific moment.
There is a timer function for this.
You can access the snipping tool timer in Windows 10 via the small arrow next to the New button:

This allows you to create a screenshot with a small delay!
Unfortunately, older versions of the snipping tool only have a maximum timer of five seconds.
Screenshot key combination in Windows 10
There are several shortcuts to take a screenshot on Windows 10. The quickest option is the PRINT key or PRINT SCREEN key, which you will find on many keyboards:

When you press the button, the screenshot is saved in the background.
You can then insert it into any web page or document.
Insert screenshot in Word under Windows 10
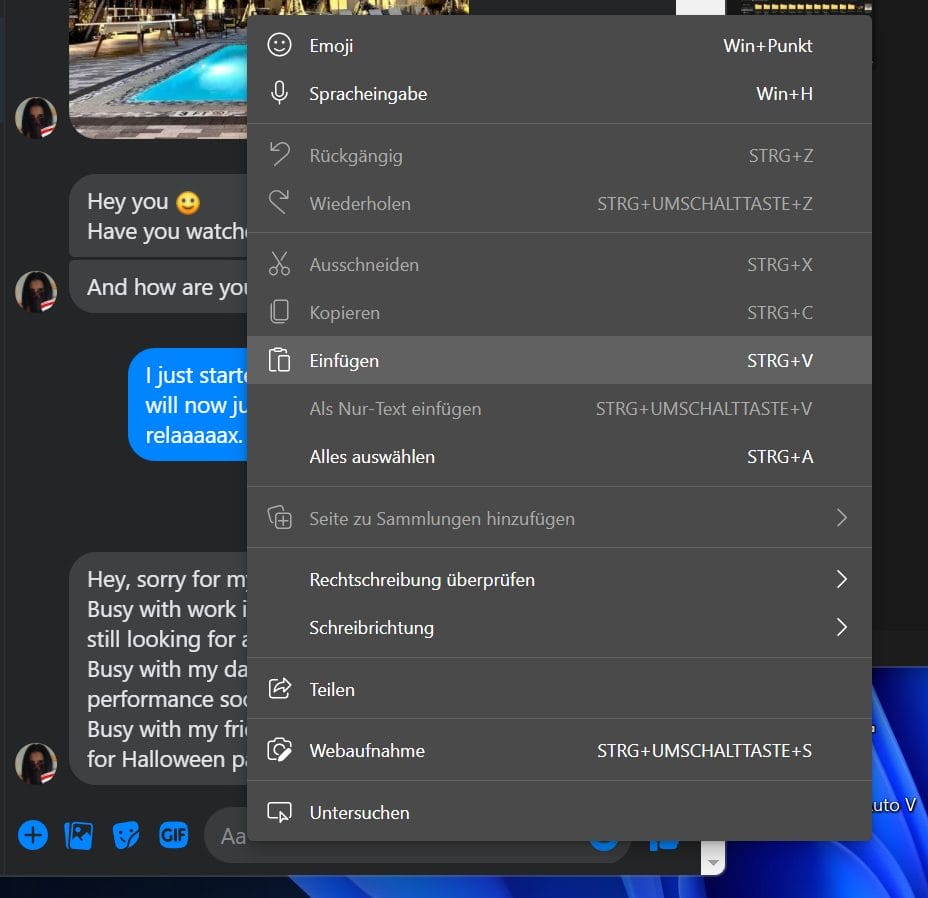
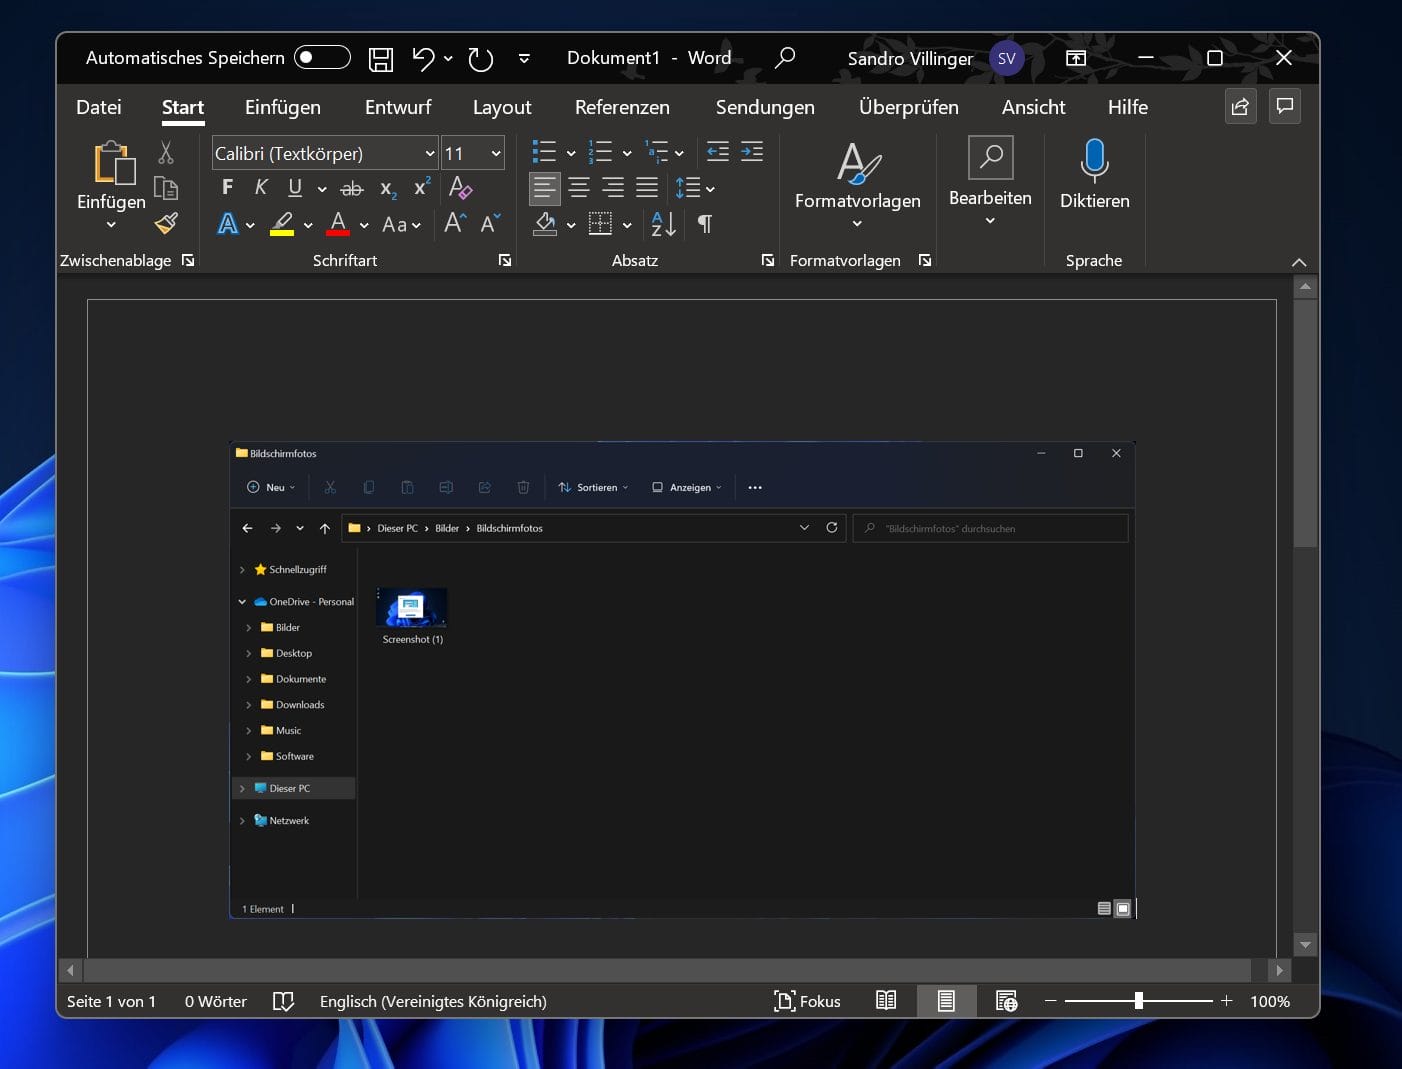
Once you have pressed the button, open Microsoft Word (or Excel or Outlook for Microsoft 365) and right-click on an empty area and select the Insert symbol (or press CTRL+V key combination):

Now you can write a text in Word underneath or even save it directly as a PDF and send it to friends or colleagues.
Tip: The newer versions of Microsoft Word, Excel, Outlook and PowerPoint contain an integrated screenshot option. It can be accessed directly via the menu bar within the respective Office program.
Insert and edit screenshot in Paint under Win 10
If you wish, you can also paste the screenshot into Paint for further editing in a flash: After pressing the Print or Print Screen button, launch an image editing tool such as Microsoft Paint or Paint 3D in Windows 10 and click Paste:

The entire photo is then inserted directly into Paint:

Record screen on Win 10 laptop
The screenshot function works on a laptop in exactly the same way as on a desktop PC with Windows 10:
Press either the Print or Print key on your laptop keyboard and paste the screenshot into Word, Paint or another application as described above.
Or you can use Snip & Sketch (or Snipping-Tool) with the key combination WINDOWS+SHIFT+S.

If you take screenshots very frequently, you can also pin the screenshot tool directly to the taskbar on your Windows 10 laptop. Here's how: Start Snip & Sketch or Cut and Sketch as described in the instructions above.

Then right-click on the icon and select Pin to taskbar. In future, you can also create a new screenshot in a flash with the right mouse button as described above - even with a timer. Practical!
Create screenshots with Windows 11
On October 5, 2021, Microsoft unveiled Windows 11. In addition to a new look and more security, the brand-new operating system also offers simplified operation. The topic of screenshots has also been simplified.
How screenshots work under Windows 11 and what are the differences? We summarize this in detail here.
Screenshot key combinations in Windows 11
In Windows 11, you can also use the following key combinations to take screenshots and edit them at lightning speed, insert them into other programs and send them:
Snipping tool shortcut: WINDOWS+SHIFT+S
The last and probably most important key combination for screenshots is WINDOWS+SHIFT+S. This starts the new snipping tool in Windows 11, the successor to the Snip & Sketch tool, which leads us to the next topic.
Shortcut 2: PRINT button
When you press this key on the keyboard (also called PRINT or PRINTSCRN), the entire Windows 11 screen is photographed in the background.
You can then paste the screenshot into any program, such as Microsoft Word or Paint 3D, like this:


Shortcut 3: WINDOWS key + PRINT
If you press these two buttons and if OneDrive is set up with automatic screenshot saving, the photo will be saved in the OneDrive folder under OneDrive Screenshots.


From there, screenshots can be copied and edited directly.
Shortcut 4: WINDOWS + G
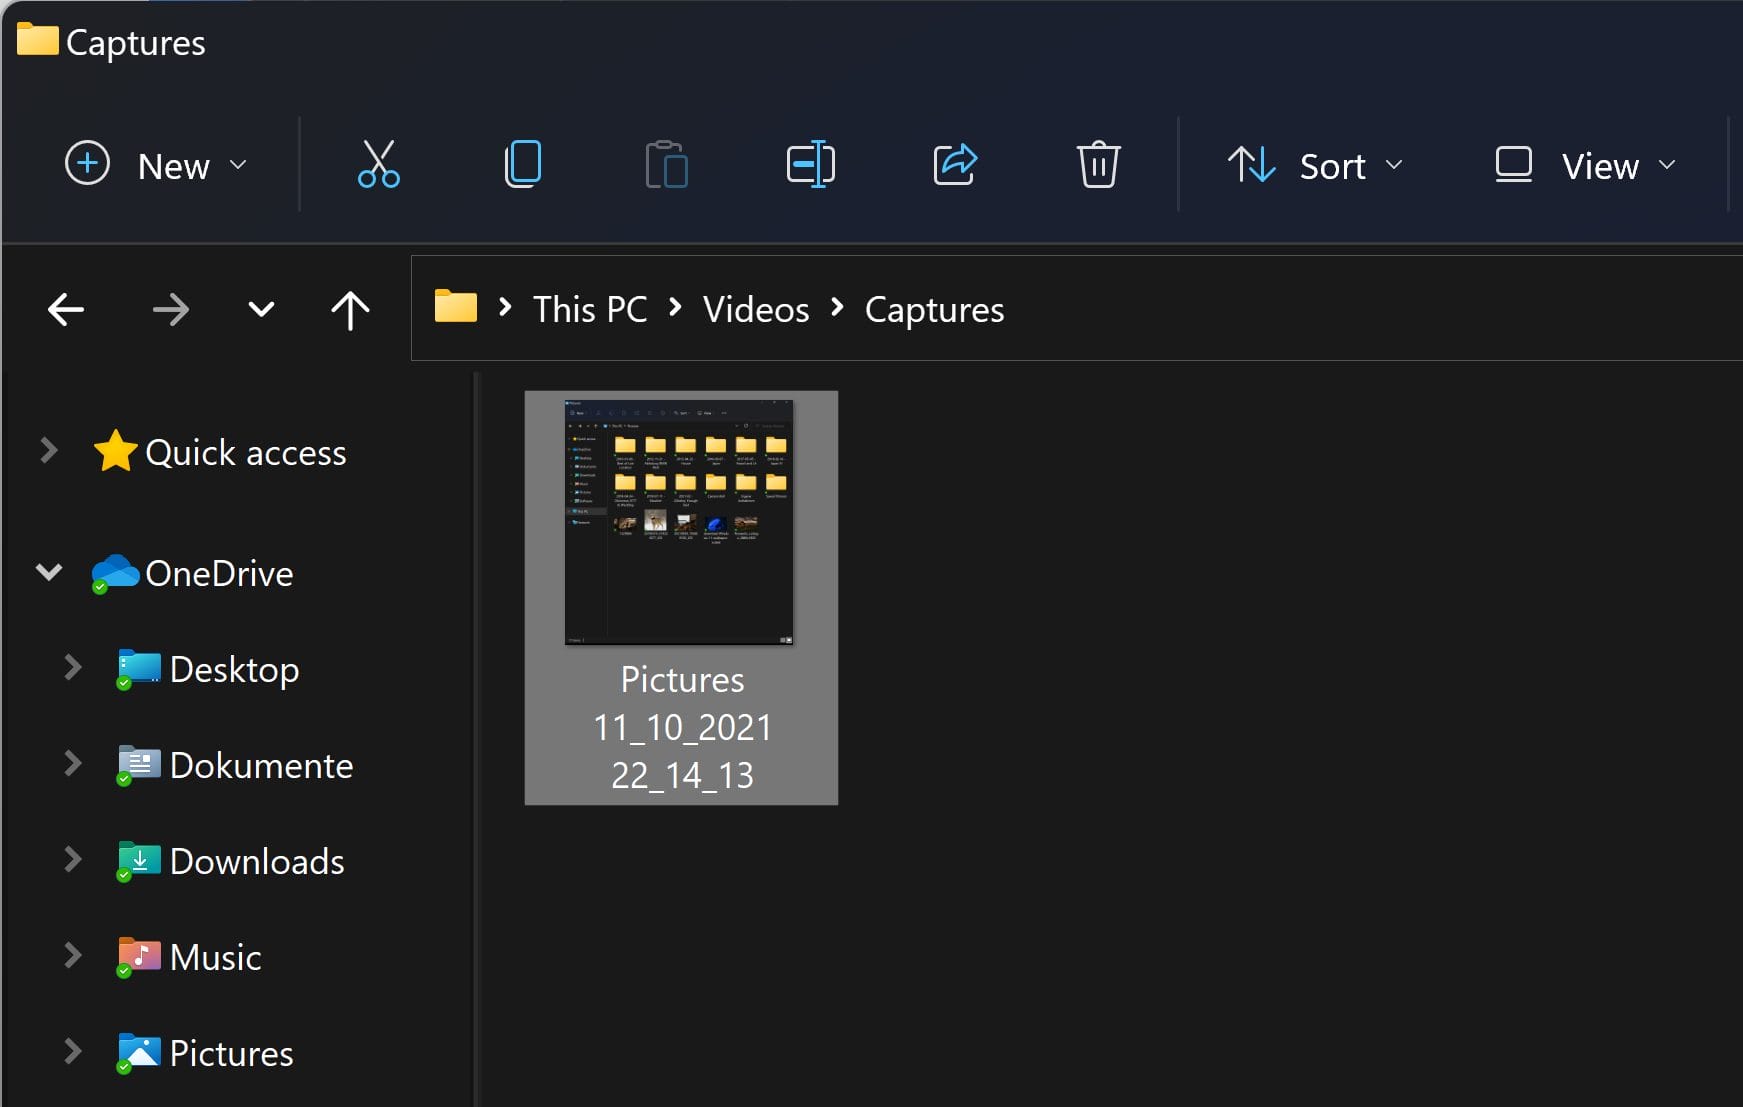
This opens the Xbox bar for video games, which can be used to create screenshots (or screencasts / screen videos) of game sequences or the desktop. The screen capture ends up under VideosCaptures or VideosRecordings.
This video guide shows the described options in a compact and comprehensible way:
Use snipping tool under Windows 11 for cut-outs & co.
The well-known Snipping Tool is still available in Windows 11, but is being replaced by a new version. Strange confusion of names from Microsoft: Although it looks like the Snip & Sketch (cutting and sketching) in the predecessor, it is called "Snipping Tool" again in Windows 11.
Click on the Windows 11 Start menu and type in Snipping Tool. The modern screenshot tool of Microsoft's operating system will then appear:


You can create screenshots with different shapes and sections (rectangular mode, window, freehand, full screen) and with or without a timer (delay).

Alternatively, call up the snipping tool with WINDOWS-SHIFT-S.
As soon as you press the key combination, the screen darkens and you can draw a section by holding down the left mouse button as indicated:

Use the bar at the top to choose between the following snapshot functions:
- Cutout: As mentioned above, use this to draw a section of the screen content.
- Freehand: You can create a freehand screenshot with the second function. It will look like the example below.
- Window: If you only want to photograph a window or a message, simply select the third option. A window will then be cut out with laser-sharp precision.
- Full screen: As with the key combination above, you can use this option to snap off the entire monitor.

When you have drawn the screenshot and released the mouse button, a notification appears at the bottom right of Windows 11. Click on it and the photo will be inserted into the editing program. Now you can get creative:


Done? That's great! Then click Save or Share above.
PS: For some users, the Windows+Shift+S shortcut does not work after switching to Windows 11 - the problem is sometimes quite persistent and the cause unclear. Affected users can only open the snipping tool by searching and clicking on the app.
Screenshots on the Windows 11 laptop
Have you treated yourself to a brand new Windows 11 laptop? Then of course you can also take a screenshot on your laptop. To do this, find the Print or PrtScrn button and press it:


The photos can then be easily inserted into an image editing program, Word, Paint, Skype and many other programs as described.
Finally, a short summary of the most important questions and answers (and even a bonus tip to save you time):
Which shortcuts under Windows 11?
The key combination (shortcut) for screenshots under Windows 11 is relatively easy to remember:
- Either the PRINT button mentioned above or PrtScrn button for a full-screen screenshot
- Or SHIFT-WINDOWS+S to call up the Snipping Tool, with which you can take dedicated screenshots to then paste a photo into Paint or Word (see instructions above)
The 5 best snipping tools for Windows 10, 11 and 7 (third-party providers)
The integrated snipping tool in Windows is already quite good, but if you want to go one step further, you should use a dedicated screenshot program for screenshots.
Every third-party snipping tool listed here offers more options for creating and editing screenshots than Microsoft's standard software with its limited range of functions.
Here is a preview of our snipping tool recommendations (we will be adding more tools in the near future, feel free to recommend professional tools that you have had good experiences with):
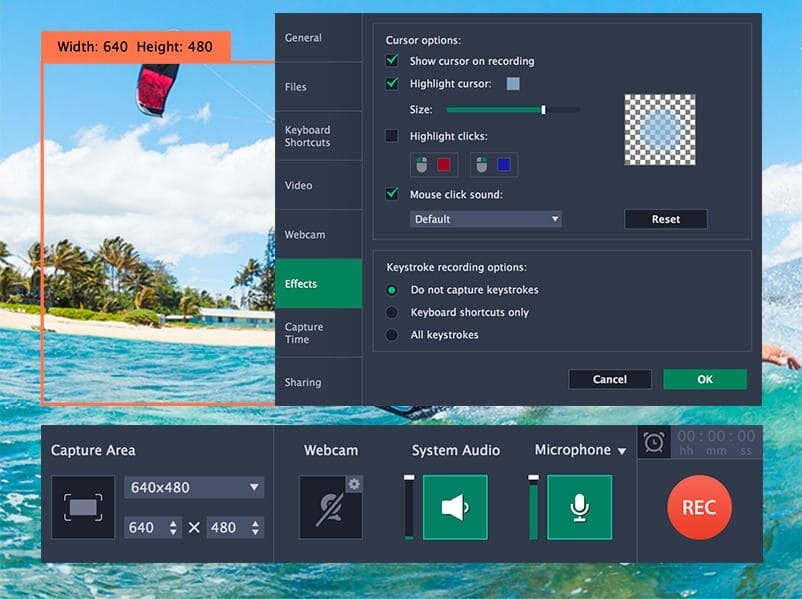
1st Movavi Screen Recorder - Comprehensive professional tool for shots and videos
Suitable for videos and screenshots: With Movavi Screen Recorder you can not only record your screen. It can be used to record online meetings, save streaming videos or create extensive tutorials - this tool makes it possible. The user-friendly interface allows you to create high-quality screen recordings with sound and then edit them directly in the program. Available for home users and businesses, Movavi Screen Recorder offers a cost-effective way to create and share professional recordings.
2. greenshot - Free all-rounder made in Germany
The integrated, versatile editor and the many functions have made the free Greenshot one of the most widely used screenshot tools.
Everything remains simple and clear. Take screenshots, edit them and share them with others - it's all done quickly and reliably.
3. PicPick - The simple, comprehensive screenshot program
At first glance, PicPick gives the impression of an office application. In reality, however, PicPick is a very comprehensive program that allows you to quickly create and edit screenshots. Free for private users, commercial users pay just under 30 US dollars per year.
4 SnagIt - The powerful wonder weapon for professionals
The professional tool SnagIt has been on the market for years and has always been one of the most important and renowned programs. At a price of 50 euros, it is not cheap, but also offers the option of recording videos with sound and sharing snapshots with other programs (messengers, e-mail, Slack, etc.) at lightning speed.
5 ShareX - The power package
Free and comprehensive: ShareX is an open source program that allows you to create dozens of types of screenshots and screencasts (screen video recordings) and then share them with ease.


Screenshots under Windows 8 and 8.1
Are you still a fan of the operating system with a tiled look? In the following section, Windows Tweaks reveals how to take screenshots with Windows 8 and Windows 8.1. We show you how to take a shot using a key combination and the free snipping tool.
Keyboard shortcuts in Windows 8 and 8.1
In Windows 8 and 8.1, there are often situations in which you want to send a screenshot of an error message, a web page or a video to a friend or colleague.
Use the following options to take screenshots in quick succession:
WINDOWS key + PRINT
The quickest way to do this is to press the WINDOWS+Print key. The entire desktop is now photographed and saved as a JPG file in the Screenshots folder under Images:

PRINT button
If you only press the PRINT key on the keyboard, the screenshot will not be saved in the folder. Instead, you have to insert it yourself in a suitable program, such as the Paint program supplied:
ALT+PRINT
This combination only captures the current window, such as an error message or a browser window.
Snipping Tool for Windows 8
The Snipping Tool for Windows 8 and 8.1 is a little more professional and can be called up by pressing the WINDOWS- + Q- key on your keyboard to call up the app tiles.
Once you have found and started it, you should right-click to pin it directly to the start bar or the tile menu.
Once started, there are several nice functions:

- Cut out a window: With this variant, you can capture a window with pixel accuracy. This is very practical if you only need to take a photo of a message.
- Full screen: This simply "screenshots" the entire screen in its full height and width.
- Rectangular cut-out: With this variant, it is possible to draw any section with the left mouse button pressed and continue using it in the snipping tool.
- Freehand: You can also create a creative freehand section of the screen.

As soon as the screenshot has been taken, it will appear in the Windows 8 snipping tool
Screenshot on Windows 8 laptop
Even with older Windows 8 or 8.1 laptops, taking screenshots is child's play: In many cases, your laptop offers a button for taking a screenshot, such as a Print, Print or Print Screen button:

You can then save and edit the screenshot as described above. The key combination WINDOWS+PRINT, for example, saves the image file directly in the screenshot folder.
Creating a screenshot under Windows 7
If you are still using Windows 7, don't worry: a screenshot tool is also pre-installed here. This is called a snipping tool and offers many important ways to create and edit a screenshot.
As it is not quite as comprehensive as in the newer versions, we recommend using a dedicated screenshot program for your Windows 7 PC or Windows 7 laptop for more functionality - these usually offer more functions and are presented below.
Screenshots in Windows 7 with key combination
Want to take a screenshot on Windows 7? We'll first show you how to easily create a screenshot on your Windows 7 laptop and then go into good screenshot programs below:
- Tap the PRINT button on your Windows 7 laptop or desktop PC:

2 Now you can easily paste the entire screen into a program such as Microsoft Paint or Word. In the example, we start good old Paint and click on Paste:

3. Although Paint is not one of the top image editing programs, you can still perform some basic editing functions - such as selecting certain sections or inserting text. When you're done, click on the disk icon at the top left to save!
About the storage location: After pressing the key combination, NO image file is saved in a Windows 7 folder. The screen recordings via shortcut are only saved temporarily (virtually in RAM) - so you can save yourself the search for Windows 7 screenshots.
Snipping tool under Windows 7
The in-house screenshot program in Windows 7, the Snipping-Tool, is more convenient
This works very simply: You can find the program in the Windows 7 start menu under All programs, Accessories and Snipping Tool (you can also simply search for it):

2. Once started, click on New. You can then directly select an area of your Windows 7 desktop or window - simply hold down the left mouse button and drag a rectangular section.


3. Shortly afterwards, the selected section will appear on your Windows 7 PC or laptop. Now you can easily edit the screenshot as shown above.
Trick: Open snipping tool with key combination
Unfortunately, the Snipping tool cannot be started so easily with a key combination in Windows 7.
We show you how to do it anyway:
Open the Start menu as described above. However, instead of starting Snipping Tool, right-click on Snipping Tool. Select Properties.


Now enter the desired keyboard combination under Key combination, such as CTRL+ALT+2.
In future, the snipping tool will start as soon as you execute the combination. It couldn't be easier!
Snap screen on Win 7 laptop
Screenshots are easy to take on your notebook with Windows 7: To do this, use the PRINT key and then paste the screenshot into a program such as Paint or Word (via copy & paste, see above).
Alternatively, you can of course also use the Windows 7 Snipping Tool, which creates screenshots in no time at all and gives you the option of marking them. Screenshots can be quickly saved as JPG or PNG.
Screenshots under Windows Vista
First in Windows Vista, Microsoft listened to the wishes of its users and introduced a screenshot program: The snipping tool that has since become famous.
Even in Windows Vista, released in 2006, you can create screenshots for presentations, for friends, hotlines or for any other purpose in no time at all.
In this section we show tips for creating screenshot tools under Vista - by hand and with tools.
Record screen with Windows Vista at the touch of a button
- There are many different key combinations to take a screenshot with Vista: The PRINT key simply photographs the entire desktop and all windows 1:1. You can paste this clone of your desktop into Word or Paint if you wish:

2. To edit the photo, you can use the font symbol or the brush. You can also rotate and crop the image. Finished? Then click on the floppy disk icon at the top left and save it.
Snipping Tool under Windows Vista
1. It's even easier with the special program Snipping Tool, which Microsoft introduced with Windows Vista. You can find it under Start, All Programs, Accessories and Snipping Tool.

2. When you click on New a photo is created immediately. Hold down the mouse button and drag a section of the screen that you want to take a photo of.

3. As soon as you let go, the photo appears in the Snipping Tool.

Screenshot under Windows XP
Whether you are nostalgic for the past or use the old classic Windows XP (released in 2001) for your own purposes: In this section, we'll show you:
- How to create screenshots with Windows XP Home and Professional
- whether the snipping tool is also available in XP flavor
- How to take photos from Internet Explorer under XP

- To create a screenshot, tap the PRINT, PRINT or Print Screen (PrntScrn) key on your Windows XP keyboard.

2. Now open any program with which you can edit photos. In this example, we'll just use good old Paint: You can find it under Start, All programs, Accessories and Paint:

3. In Paint, click Edit and Paste at the top.

With Paint, you can quickly edit, mark, label, save or even print the photo.
Does Windows XP have a snipping tool?
No. The snipping tool was only introduced with Vista and is only part of Windows Vista, Windows 7, Windows 8, 10 and 11. Nevertheless, it is possible to take a screenshot or a screenshot of Windows XP - it's just not as easy and convenient. Read above to find out how it works.
How do I create screenshots under Win XP WITHOUT the print button?
Not every Windows XP PC or laptop has a dedicated screenshot button and in some cases the button does not work at all.
On Windows XP tablets, you can take a screenshot by pressing the WINDOWS button and the "Volume down" button.
For a detailed overview of how to take and edit screenshots, other alternatives and secret tricks, read our article Taking a screenshot in Windows XP.
Creating a screenshot on a PC and laptop - what are the differences?
You want to take a screenshot on your PC or laptop - what's the quickest way to do it? And what's the difference between screen printing on a desktop computer and a notebook?
In this section, we will show you how to take a PC screenshot using the pushbutton on a laptop or desktop computer with Windows 7, Windows 7, Windows 10 and Windows 11 and what the differences are.


The buttons may look slightly different from one another and are sometimes labeled differently - but taking screenshots works the same way everywhere.
Screenshot on laptop
In our test, we looked at laptops from all the major manufacturers: The guide will help if you have an HP laptop, Dell laptop, Acer laptop or Lenovo laptop.
Screenshots on the laptop can be created by pressing:
- Print Screen
- Camera symbol
- Screenshot icon
- Print screen button
And these keys for screenshots look like this for the largest laptop manufacturers:


On some laptops, this may simply be a key that looks like a camera or a photo. In this case, take a closer look at the keyboard to find the right key.
Screenshot on the PC
On a desktop PC, it is just as easy to create a screenshot. To do this, you must first look for a key on the keyboardtur with a designation such as PRT SCRN, PRINT (F12) or Print.

One press of this button is enough to take a picture of the entire screen content of the computer - from the first to the last pixel.
Then you can quickly paste the photo into Paint or Word.
Just click on File (or Edit) in a program after pressing the PRINT key and then on Insert.

An alternative is to use the following key combinations:
WINDOWS key + PRINT: If you also press the WINDOWS key in addition to the above-mentioned PRINT key, the photo is pasted directly into the Windows screenshot folder (usually under C:UserYOUR_NAMEPicturesScreenshots or OneDrivePictures
ALT+PRINT: If you print ALT+PRINT at the same time, only the current window, such as an error message or a browser window, is captured.
The snipping tools for Windows PCs are even more convenient and somewhat more precise - you can find the instructions above in the respective Windows version.
Because Microsoft has revised its own integrated screenshot program quite often over the years. An overview of these sometimes somewhat confusing changes and renames follows in the next section.
How to take a screenshot on a Mac OS computer (Apple)
Under Mac OS X, you can take a screenshot of the entire screen content with the following shortcut:
- Hold down the Command + Shift + 3 keys
- The screenshot is created automatically and saved on the desktop as an image file.
And this is how you take a screenshot of a freely selectable section or open window:
- Hold down the Command + Shift + 4 keys.
- Now the screenshot tool opens and turns the arrow cursor of the mouse into a crosshair cursor
- Hold down the mouse button, select the desired screen section and then release the mouse button
- The screenshot is created automatically and saved on the desktop as an image file.
Copyright & Co.: What to look out for in screen recordings?
A screenshot is also a form of art: especially for instructions or if you are depicting an error message, you should exercise precision and care.
You must pay attention to this:
- First of all, you may not publish online screenshots of copyrighted material (such as films) without copyright.
- Furthermore, you should make sure that no rights to your own image are violated or that people can be seen in the screenshots - otherwise you must ask these people for permission.
- Of course, you should make sure that the photo has a clean background or that a window is cut out very precisely.


Both of the above variants are much "cleaner" than a screenshot with other windows behind it, like this:

Screenshot black? Netflix problems and graphics card errors
Is a screenshot black or cannot be inserted?
Now, you must first make sure that you do not take a screenshot of a DRM-protected video.
For example, Windows prevents you from taking a screenshot of Netflix. This is then simply black due to the copyright mechanism
If the screenshot remains black, it may be due to the graphics card driver. In such a case, you should simply update or reinstall it.
Screencast: Record screen videos with Windows 10 and 11
Since Windows 10 (and therefore also Windows 11), you can record a video (screencast) in addition to a short screenshot and send it to friends.
This can be a process on your desktop, for example, if you want to send instructions to friends or an achievement in a game.
How it works with our screencast quick guide:
1. tap G while holding down the WINDOWS button to start the Xbox game bar (Game Bar). The following overlay will then appear:

Click the record button at the top left to start video recording. This can be during a game or simply while working.
Let the recording run for as long as you like (caution: your hard disk space is limited, depending on the screen resolution, a video can become quite large).

2. If you also want to record an audio commentary, click on the microphone icon and start in your best podcast voice.

3. Ready? Then press the STOP button. The recording is now available in the C:UsersBENUTZERVideosAufnahmen or C:UsersBENUTZERCaptures folder.
In another article, we reveal everything you need to know about video capturing and screencasting of games and programs. In it we go more into detail and alternative tools.
Why do you need screenshots? The 5 most common areas of application
PC newbies will be amazed: you can take screenshots of all areas of your Windows PC or laptop. Be it from a website, a Windows error message or a favorite scene from a game. You can either take a screenshot of the entire screen display or just small sections of it.
Screenshots are practical and quick to take: With Windows screenshots, you can share something important with friends or colleagues, take a photo of an error message on your PC or laptop or use screenshots to remind yourself of something later. They are sometimes even essential for presentations or support hotlines.
Screenshots are useful for many purposes. The 5 most common are:
- Error messages: If a program or Windows crashes with an error message that you do not understand, you can take a screenshot of the message and then send it to a knowledgeable friend or support employee.
- As evidence: If someone bullies you in a chat or writes unkind things about you, you can take a screenshot of it. This is just one example of taking evidence with screenshots.
- When playing games (PC, Xbox, Playstation etc.): Are you in the middle of a game and want to capture a funny moment or an achievement (achievement unlocked) for eternity? Then a screenshot is the best choice. In a future article, we will tell you how to take screenshots and videos of games.
- Instructions: If you are writing instructions, for example for a friend, you can use screenshots to quickly show which button a user should click on. Very similar to this article here (meta!).
- Messages: Do you like a particular news item online? Then you can not only send it, but also simply take a screenshot of it and send it to friends via Messenger.
All Windows screenshot shortcuts (Cheatsheet)
Here is another cheatsheet with all screenshot shortcuts for Windows 10, 11, 8, 7 and even XP. This overview shows the differences between the various keyboard shortcuts.
Windows 11 screenshot shortcuts
PRINT key: Use the Print key to copy the entire Windows 11 screen as a photo to the clipboard. This means you must then paste it into a program such as Word, Photoshop, PowerPoint, Paint or a browser (e.g. Facebook Messenger) using the key combination CTRL+V. Alternatively, you can also right-click and then paste.
This is what it looks like when you paste the Windows 11 screenshot into Facebook Messenger after the shortcut via the context menu:

WINDOWS key + PRINT (or also PrtScn and PRINT ): Windows 11 then saves a photo in the screenshot folder. You can find this in the Screenshot directory via Windows Explorer.
WINDOWS key + ALT + PRINT: Saves a photo of the currently open window in the screenshot folder and in the Windows 11 clipboard.
WINDOWS + SHIFT + S: Starts the snipping tool, with which you can immediately draw a section and save it as a photo (JPG or PNG).
Double-click with the Surface Pen: On a Surface Book, Surface Pro or tablet, a double-click with the pen in Win 11 is all it takes to take a screenshot that you can edit immediately (in OneNote, for example).
WINDOWS + G: The Xbox game bar then pops up, which you can also use to create a screenshot (or even video) of a game or the desktop. You can find the recording in your user folder under VideosCaptures or VideosCaptures.

XBox Game Bar "Take Screenshot"
Windows 10 screenshot key combination
PRINT: This button allows you to take a simple snapshot of the entire Windows 10 screen. Now simply open a program such as Word or Paint and paste the photo - from here you can edit it further or share it.
WINDOWS key + PRINT (or also referred to as PrtScn and PRINT ): Windows 10 saves a photo in the screenshot directory under Pictures on your hard disk when you print these two keys.

WINDOWS key + ALT + PRINT: This combination takes a screenshot of the currently active window, such as your browser or an error message.
WINDOWS + G: Originally intended for gamers, but also suitable for normal users. The Xbox game bar in Windows 10 allows you to take a screenshot of a game or your desktop. Even videos are possible. The bar appears when you press WINDOWS+G. Simply select Take screenshot or Screenshot in the top left-hand corner. That's it! You will find the recording in your user folder under VideosCaptures or VideosAufnahmen.

WINDOWS + SHIFT + S: Starts the snipping tool as described above, with which you can start a photo of your screen at lightning speed.
Double-click with the Surface Pen: Do you have a Windows 10 tablet or a Surface Book? Then you can take a screenshot with the pen by double-clicking the pen button.
Windows 8 screenshot key combination
PRINT: The entire Windows 8 screen content is captured in the form of a screenshot. However, you will not see it at first. You must first insert it into a program for editing, such as Paint.
WINDOWS key + PRINT (or also PrtScn and PRINT ): Creates a complete screenshot, similar to PRINT above. However, if you also press the Windows key, the photo is saved in PNG form directly to your screenshot folder on the hard disk. You can also find this in Windows 8 under Pictures.
WINDOWS key + ALT + PRINT: This combination simply cuts out a window that you have just selected. Great if you want to take a screenshot of an error message or a browser.
Windows 7 screenshot key combination
PRINT: In addition to the snipping tool, you can use the PRINT key in Windows 7 to quickly create a photo using a shortcut. To use it further, open Paint or any image editing program and select EditPaste.
WINDOWS key + PRINT (or also referred to as PrtScn and PRINT ): Works like the PRINT button, but at the same time ensures that the screenshot is also saved in the Screenshot folder. This way, you can easily insert it into emails.
WINDOWS key + ALT + PRINT: Creates a screenshot of the currently open window under Win 7. Then simply paste it into a program and edit or send it.
Windows XP Screenshot key combination
PRINT: In XP, open all windows, messages or browsers of which you want a photo. Then press the PRINT (PrtScn / PRINT) key on your keyboard once. Then click on Start, All programs, Accessories and Paint and select Paste under Edit .
ALT + PRINT: Functions in XP like the message above, but only allows you to create a screenshot of the current window. This saves space and effort.
FAQ
Here is a summary of the most important questions and answers about screenshots with Windows:


EPILOG: The first screenshots were printed in the 1970s (perhaps even by Bill Gates 😉 )
When was the first ever screenshot taken?
Small quiz question at the end of the article...
Well, screenshots have been possible for a few decades now - but according to this The Atlantic article, it all started in 1959 with the first photograph of a computer screen.
In the 1960s, screenshots became important for the first time. Back then, researchers wanted to show what could be done with computers. Pioneers like Ivan Sutherland developed programs like Sketchpad, which allowed people to draw and design on the computer. But without the internet, others couldn't see what was happening on the screens. So they took photos of the screens - the first real screenshots!
These images were then printed in books and magazines. So everyone could see how to work with computers. The screenshots helped to show that computers are not just simple machines, but creative tools that you can work with.
The screenshot story continued: In the 1970s, PC software developers then had to equip the content of their programs with so-called capture functions, as it was also necessary at that time to print out error messages or simply content.
On paper!
These first screenshots were sent directly to the printer back then - saving them as JPGs and the like was still a long way off. And Windows did not yet exist, but a certain Bill Gates founded Microsoft at that time (on April 4, 1975).
Of course, digitization is much more advanced these days and screenshots are only printed out in exceptional cases: Each pixel is saved 1:1 digitally and then copied to the clipboard. From there, we paste them into Paint and Word or any other program.
It's hard to believe, but just a few decades ago this was technically impossible.
Screenshot science fiction, so to speak...
Questions, ideas and comments? Leave us a comment below!

On Windows Tweaks you will find time-saving tech guides for PC, software & Microsoft. For a stress-free digital everyday life. Already We have been tweaking Windows since 1998 and just don't stop!
