
Quick overview:
Deactivate programs in Windows 7 autostart
- Use the key combination Windows key + R to open the "Run" input window
- Type in "msconfig" and press "Enter"
- Open the "System startup" tab in the new window
- Uncheck all programs that should not start at boot time.
- Click "OK" and restart the Win 7 PC - done.
System startup problem solved? Autostart in Windows 7 successfully cleaned up and programs and background processes deactivated?
Or is your Win 7 startup problem a little trickier?
That was the quick guide. You can read more tricks and help on the individual steps below - we have even more detailed instructions and alternative solutions for Windows 7 autostart.
Such as the "Execute" window can be called up with: "Start" > "Search programs/files" > type in "Execute" and open...
Where is the autostart folder in Windows 7?
The personal autostart folder of a Win 7 user can be found under:
- C:UsersAppDataRoamingMicrosoftWindowsStart MenuProgramsStartup (only insert the correct user name!)
The shared startup folder of all users is located at:
- C:ProgramDataMicrosoftWindowsStart MenuProgramsStartup
The shared folder can also be accessed with the mouse via the Start menu:
- Start > All programs, right-click on "Startup" and "Open"
2 Tips for the autostart folder with the startup programs:
- Startup folder tip: If there is no Windows 7 Autostart folder under the paths mentioned above, create the folder manually. Then copy the exe files of applications that are to be started automatically at system startup into this folder (to add programs to Win 7 Autostart) (for advantages, see sections below).
- Startup folder tip: Sometimes the Autostart folder with the startup programs is present, but is hidden in the program folder. In this case, the startup folder is only displayed after activating "Show hidden files, folders and drives" under "Tools" > "Folder options" > "View" in Windows Explorer.
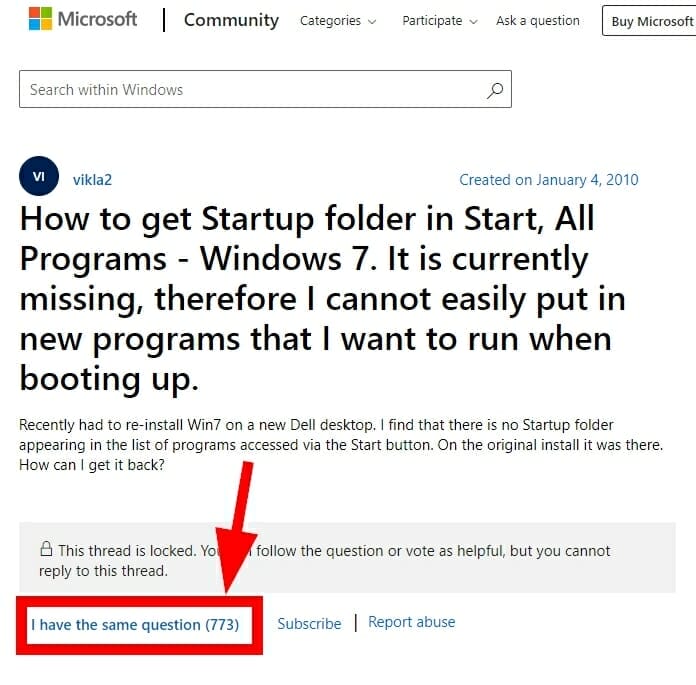
Windows 7 Autostart folder with programs disappeared? The Microsoft community knows the problem...
The two paths mentioned above are particularly helpful if the Autostart folder entry in the Windows 7 Start menu has suddenly disappeared. A common question in Microsoft forums (see screenshot below) - this problem often occurs after a new Windows installation.
Manage automatic start-ups under Windows 7, faster booting - and what to consider?
You finally want to tidy up your Windows 7 autostart. In other words, deactivate all unnecessary services and applications that run by default from system startup but are not needed?
The solution is very simple and can be done with just a few mouse clicks - but before you delete programs from Windows 7 Autostart, you should think again:
1. which start programs are not required?
In general, the following applies to deactivating programs in Windows 7 Autostart:
Most applications do NOT need to be started automatically at system startup - this slows down booting unnecessarily and is user-unfriendly.
2. exceptions: Which programs should I add and not deactivate?
There are exceptions among the start programs that should only be removed from the autostart folder with caution:
- Antivirus software and other security tools
- Applications for the graphics or sound cards
- Software that is used every time you use your PC - adding a program here sometimes provides more user convenience
To avoid problems, it is better to log larger changes: If you remove a lot of startup applications in Windows 7, you should make a note of them. This way, you can track the changes later and easily undo them if you notice that certain programs are needed at system startup after all.
Find & manually remove autostart programs under Windows 7 (detailed instructions)
There are various ways to configure the Autostart function in Windows 7. The following instructions describe the most common approach, which works in most Windows installations (not just Windows 7).
Step 1: Display system startup applications
First of all, you have to find and call the autostart programs - and this is how it works:
- Open the Start menu - for example, by clicking the Windows button in your taskbar or by pressing the Windows key on the keyboard.
- Now enter the word "Run" in the Search programs/files input field and start the Windows 7 Run application by clicking on the search hit displayed. Alternatively, press Windows key + R at the same time - this key combination calls up the command line directly under Windows 7.
- Type the command "msconfig" into the command line and press Enter.
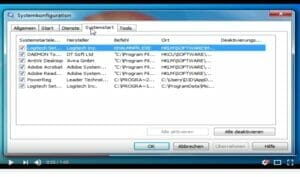
- A window will now open showing the Windows 7 system configuration - including the Autostart services.
- Click on "System startup" in the tab menu - and you will be shown all the programs that Windows 7 automatically runs in the background at system startup.
But how can you remove the unwanted Windows 7 Autostart programs?
The following steps show this in more detail than the quick guide above...
Step 2: Manually remove programs from the system startup
In the open "System startup" view, you can now easily remove all Windows startup programs that are not required - and this is how it works:
- In the "Disable startup items" area, there is a box with a checkmark in front of each program displayed - simply remove the checkmark to prevent Windows 7 from running the respective service every time the system is started in future.
- Once you have removed all the desired autostart programs by unchecking the boxes, click on the "Apply" button to confirm. Then close the system configuration by clicking on "Ok".
- Now you will see a message that the changes will only take effect after restarting the operating system. Restart your computer now - from now on this process should be faster again!
How do you edit autostart apps in Windows 10? Or in good old Win XP?
In other versions of the Microsoft operating system, start programs can be managed in a similar way - but the individual steps can differ considerably.
Do you use Win 10 or Windows XP? Here you can find help and step-by-step instructions:
- Windows 10 Autostart: If you are using the latest version of Windows 10, you can find instructions here: Disable and change Windows 10 Autostart programs and start your PC faster
- Autostart in Windows XP: If you are still using the classic version, take a look here: Windows XP Autostart - Remove hidden autostart programs
FAQ

On Windows Tweaks you will find time-saving tech guides for PC, software & Microsoft. For a stress-free digital everyday life. Already We have been tweaking Windows since 1998 and just don't stop!
