


Quick overview:
The digital ISDN (Integrated Services Digital Network) technology gives the Internet user an additional plus in speed compared to modems as well as a more stable connection. If you have an ISDN card in your computer and a corresponding telephone system, these instructions will help you to get your Windows 98 up and running for ISDN.
Example for the installation via AVM Fritz card
1. Click Start > Settings > Control Panel to access the Control Panel: The hub of your computer settings.
2. Start Hardware and select Next twice in succession. Before you click Next again, select No the device is not in the list.
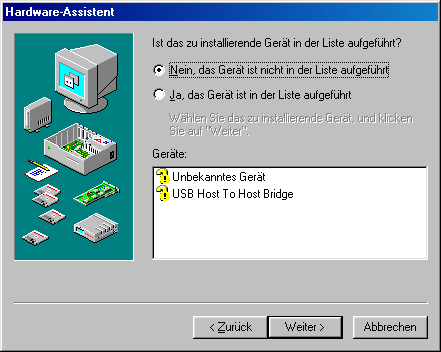
3. In the window that appears, select No, select hardware from the list and double-click on Other component.
4. A list appears, which you ignore completely and click on Diskette. Now insert the driver diskette or CD-ROM of your ISDN card into the drive and navigate to the driver path via the Explorer that now appears.
5. The computer will now install the drivers and set up the system. After a while, you will be asked to restart the computer - follow this prompt.
6. As soon as Windows 98 has booted up again, a message pops up asking you to install the important CAPI port.
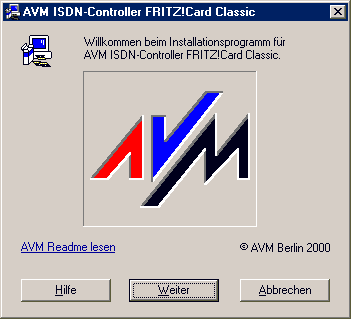
7. Once again, the only way out is to click on Next. In the following dialog, select a directory on your hard drive for the files. I recommend entering a clear path such as C:\Program Files\AVM ISDN Controller Fritz! Card so that you don't lose track of the many programs later on.
8. In the next window, select Euro ISDN and confirm once again.
9. Finally, some relevant information concerning your driver installation is displayed.
10. Now open the hardware wizard as described above and go through steps 1 to 3 again. Now select Network cards instead of Other components.
11. In the next window (with the large list), click on Data carrier and go to the location of the CAPI driver files on your driver CD-ROM/diskette. As above, these are mostly clearly described or listed in the manual.
12. The AVM NDIS WAN CAPI driver (WDM) device now appears in the next window. Click Next again to install this driver. In the next window, click on Finish to integrate the drivers.
13. A new ISDN configuration window appears in which you first click on Next and then set D-channel protocol to Automatic. If you want to use your computer as a fax/answering machine, you only need to enter this number here and confirm. Click on Finish to complete the ISDN installation and restart your computer.
Now all you need to do is dial up to the Internet. And this is how you proceed: You will soon be online - dialing into the Internet.
Editor's note: This article was produced by Sandro Villinger and comes from the Windows tweaks archive, which has been built up since the end of the 1990s.

On Windows Tweaks you will find time-saving tech guides for PC, software & Microsoft. For a stress-free digital everyday life. Already We have been tweaking Windows since 1998 and just don't stop!

 Deutsch
 English