
Quick overview:
Every time you access information, be it a page or a specific file, certain data is retrieved. This includes the direct address of the respective remote site and its name as well as information about it. This information is loaded in a specific part of the working memory so that it is available again at lightning speed. However, this part is relatively small and therefore a lot of page information has to be retrieved again, which costs time, nerves and, in many cases, money. This can be remedied by increasing the so-called DNS cache in which this information is stored.
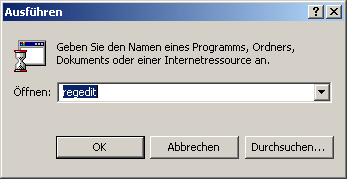
1. Click on Start > Run and type regedit in the command line and confirm with OK. The program for editing the Windows registry will now open.
2. Navigate through the keys HKEY_LOCAL_MACHINE\SYSTEM\CurrentControlSet\ Services\Dnscache\Parameters.
3. Now right-click in the right-hand pane and select New > DWORD value.
4. A brand new value now appears - name this self-created entry CacheHashTableBucketSize. After you have now double-clicked on it and entered 50 (decimal must be activated, as with all subsequent values), the columns in the DNS info table are expanded. You can now continue directly with the next step.
5. Repeat step 3 and this time name the newly created value CacheHashTableSize. Double-click on this entry and insert the number 311, which will increase the lines of DNS entries! All prime numbers are allowed, so you can also experiment with higher values, which you can find on this page.
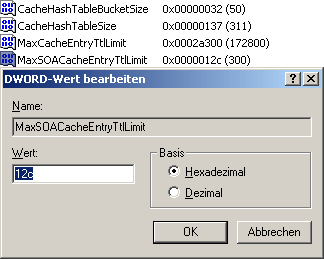
6. You need to create a new DWORD value for the penultimate time. This time it is called MaxCacheEntryTtlLimit. The obligatory double-click opens the equally familiar dialog window in which this time you select Decimal and 172800, which will keep the cache active for 2 days before it is deleted (manual deletion, for page load problems: Start/Run and type in ipconfig /flushdns).
7. And sighing, you proceed to create a final value of the DWORD brand and enter it as MaxSOACacheEntryTtlLimit. Another click on Decimal and the entry 300 ends the lengthy procedure with a click on OK. And this is what the entire right-hand pane looks like at the end of the tedious fiddling:
After a restart, the cache has been increased far beyond the known Windows limits..
NOTE FOR NEW PUBLICATION: This article was produced by Sandro Villinger and comes from the Windows Tweaks archive, which has been built up since the late 1990s.

On Windows Tweaks you will find time-saving tech guides for PC, software & Microsoft. For a stress-free digital everyday life. Already We have been tweaking Windows since 1998 and just don't stop!
