
Quick overview:
Rumors have been circulating for some time about the defragmentation tool built into Windows 2000 and XP, alleging that it has some security flaws. If you want to play it safe and use a third-party program, follow my instructions to remove the built-in version. You should back up your system first, as this procedure carries risks. In most cases, nothing goes wrong, but it’s not recommended.
Step 1 - Create a backup of the registration database
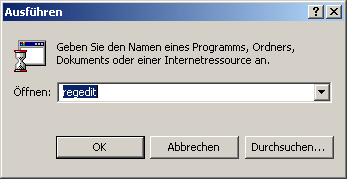
You need to back up a few keys in the registry. Open Regedit (Start > Run, then type regedit).
Go to the following keys one by one and save each one (File > Export > Selected Subtree). The individual keys will then be saved as a file somewhere (wherever you want).
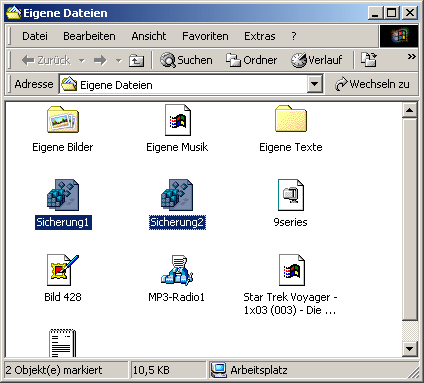
Don't forget where you put these. You'll need them later:
HKEY_LOCAL_MACHINE\SOFTWARE\Microsoft\Windows NT\CurrentVersion\SourcePath
HKEY_LOCAL_MACHINE\SOFTWARE\Microsoft\Windows NT\CurrentVersion
Step 2 - Remove defragmentation files from the SYSTEM32 folder
Now you need to delete the main files of the defragmentation program. To do this, click on My Computer > WINNT > SYSTEM32. Now locate the files
DfrgFat.exe
DfrgRes.dll
DfrgUI.dll
DfrgSnap.dll
DfrgNtfs.exe
and delete them all.
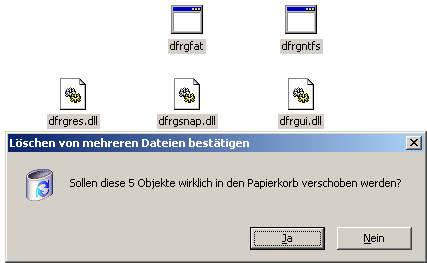
Step 3 - Remove defragmentation files from the DLLCACHE folder
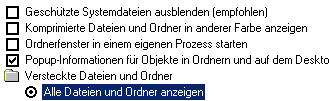
Now repeat the same process with the same files in the DLLCACHE folder, which is also located in the WINNT\SYSTEM32 directory. However, you must first make it visible. To do this, click Tools > Folder Options > View in Explorer and uncheck the box next to "Hide protected operating system files (Recommended)." You can safely confirm the following warning message by clicking Yes. Now scroll down further in the same window and select the option Show all files and folders.
Now click OK and double-click the new DLLCACHE folder that appears. The files listed above, which need to be deleted, are located here. You can now undo the changes you made to the system and hidden files.
In some cases, a warning message will appear; click "Cancel" first, then "Yes" to confirm.
Step 4 - Delete registry entries
Now open the Registry by going to Start > Run > regedit (type it in), and delete the following key
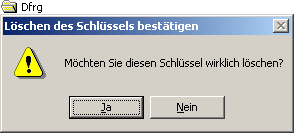
HKEY_LOCAL_MACHINE\SOFTWARE\Microsoft\MMC\NodeTypes\ {476e644a-aaff-11d0-b944-00c04fd8d5b0}\Extensions\NameSpace\ {43668E21-2636-11D1-A1CE-0080C88593A5} by selecting it and pressing Delete. Of course, confirm the message by clicking Yes. Proceed in exactly the same way with the following entries in the Registry:
HKEY_LOCAL_MACHINE\SOFTWARE\Microsoft\Dfrg HKEY_LOCAL_MACHINE\SOFTWARE\Microsoft\Windows\CurrentVersion\ Explorer\MyComputer\DefragPath
HKEY_CLASSES_ROOT\CLSID\{80EE4901-33A8-11d1-A213-0080C88593A5} HKEY_CLASSES_ROOT\CLSID\{80EE4902-33A8-11d1-A213-0080C88593A5} HKEY_LOCAL_MACHINE\SOFTWARE\Microsoft\MMC\SnapIns\ {43668E21-2636-11D1-A1CE-0080C88593A5}
HKEY_LOCAL_MACHINE\SOFTWARE\Microsoft\MMC\NodeTypes\ {476e644a-aaff-11d0-b944-00c04fd8d5b0}\Extensions\ContextMenu\ {43668E21-2636-11D1-A1CE-0080C88593A5}
Step 5 - Restore the previously backed up registry entries
Now go to the folder you selected for your backup in step 1 and restore all three files. To do this, simply double-click on the files!

The process is now finally complete, and you can safely restart your computer. You can also (if you wish) delete the Start menu entry for the defragmentation program. It is located under Start > Programs
NOTE FOR NEW PUBLICATION: This article was produced by Sandro Villinger and comes from the Windows Tweaks archive, which has been built up since the late 1990s.

On Windows Tweaks you will find time-saving tech guides for PC, software & Microsoft. For a stress-free digital everyday life. Already We have been tweaking Windows since 1998 and just don't stop!
