
Quick overview:
Im Programm Regedit.exe können sie bequem (und ohne Tools von Fremdherstellern) den Hintergrund für die Symbolleiste verändern. Mit wenigen Schritten verwandeln sie die eintönige Standartleiste in ein farbenfrohes Designerstück. Und so gehen sie vor:
1. First click on "Start" and then on "Run". A command line appears in which you now enter "regedit" followed by "Enter".
2. Click through the keys HKEY_CURRENT_USER\Software\Microsoft\Internet Explorer\Toolbar. In the right-hand pane, right-click on a free area.
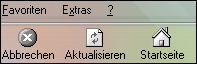
3. Select New > String from the list that appears. Now name this BackBitmapIE5. Now double-click on it and enter the exact path to the image file. Here is an example:
![]()
4. It is important to note that this may only be in BMP format. JPG, WMF, GIF etc. are not supported. If your desired image is saved in .JPG format, continue with step 5. Otherwise, simply confirm with OK and close all windows. The images will be visible the next time you open Internet Explorer.
5. Now open the desired JPG image with Internet Explorer.
5. Convert it to BMP format using "Datei" > "Save as..." > "File type: Bitmap". You can now use the image as described above.
Update:
I have designed 3 backgrounds for you that transform Internet Explorer into a small work of art. You get a more beautiful display with clear lines and a look that goes hand in hand with Internet Explorer. Here is a small preview:
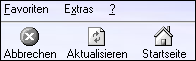


Please make your own impression and download the backgrounds, because their true beauty does not really come into its own in these simple previews. The last 4 pictures are from the WinTuning Kit 2002 by Sascha Meier, who is the webmaster of www.wintuning.net. Many thanks!
DOWNLOAD: Internet Explorer Technical & Fantasy Style
After you have downloaded the file, you only need to change the above path in the Windows registry.
NOTE FOR NEW PUBLICATION: This article was produced by Sandro Villinger and comes from the Windows Tweaks archive, which has been built up since the late 1990s.

On Windows Tweaks you will find time-saving tech guides for PC, software & Microsoft. For a stress-free digital everyday life. Already We have been tweaking Windows since 1998 and just don't stop!
