
Quick overview:
Viele Benutzer schrecken vor der Installation eines Betriebssystems mit kritischem Blick zurück. Mittlerweile sind aber diese Vorgänge sehr einfach und weitgehend problemlos gestaltet so dass sich auch Anfänger daran wagen. Wenn Sie nun noch diese Anleitung beachten kann nichts mehr schiefgehen.
The requirements for your computer
Windows XP stellt besonders an den Arbeitsspeicher hohe Ansprüche. Man sollte mindestens 256 Megabyte sein Eigen nennen, damit Freude bei der Arbeit aufkommt. Rechner mit lediglich 128 Megabyte oder weniger müssen Abstriche machen und Kompromisse eingehen. So empfiehlt es sich hier dann die neuen Funktionen auszuschalten damit Windows ohne Komplikationen und ausreichend schnell läuft.
Microsoft persönlich gibt ein Minimum von 64MB an, was ich für untertrieben halte.
Auch der Prozessor sollte einiges leisten können. Die offiziellen Minimalanforderungen in diesem Bereich liegen bei 300 Mhz wobei ich einen optimalen Betrieb erst ab 550 Mhz garantieren kann.
Im Handbuch von Windows XP steht geschrieben, dass mindestens 1 Gigabyte auf der Festplatte frei sein sollten. Nach der Installation wundert man sich, dass ca. 1,5 Gigabyte belegt werden - mitsamt der Auslagerungsdatei. Falls später auch noch Programme und Daten hinzukommen sollten Sie sich mindestens 3-4 GB Spielraum für XP selbst einrichten und alles darüber hinaus für die Programme.
If your computer meets these requirements, you can continue reading with peace of mind.
Blue screen during installation - The ACPI scapegoat
If you see a blue screen right at the beginning of the installation or during hardware detection, which tells you in English that there has been an ACPI error, you must react immediately.
ACPI ist das Energieverwaltungssystem von Windows XP und greift ziemlich tief ins System ein. Es übernimmt auch die Verwaltung der verschiedenen Geräte. Bei manche Hauptplatinen kann es deshalb zu Problemen kommen, weil Windows deren ACPI Unterstützung nicht erkennen.
Um das Problem zu beheben, müssen Sie den ACPI Bildschirm bei der Installation ausschalten. Direkt am Anfang (Schritt 5) werden Sie aufgefordert zur Installation eines SCSI Adapters die F5 Taste zu drücken. Genau bei dieser Stelle drücken Sie nun F6 und finden sich sogleich in einem Menü wieder in welchem Sie Standard PC angeben. Bestätigen Sie dies nun mit Enter und setzen Sie unbehelligt die Installation fort.
Install Windows XP and use the hard disk deletion option
Here you will be navigated through the installation step by step. It is advisable to delete all existing files by formatting the hard disk. This way you will have a fast, stable and virgin system which will not cause any problems due to old files. And this is how you proceed:
1. Schalten Sie ihren Computer ein und drücken Sie direkt die ENTF oder F2 Taste um ins Grundprogramm (BIOS) des Computers zu gelangen. Die Tasten und einige Begriffe weichen möglicherweise ab - ein Blick ins Handbuch schadet in den wenigsten Fällen.
2. Sie sollten nun einen blau/gelben Bildschirm vor sich sehen in welchem Sie mithilfe des Cursors auf BIOS Features Setup gehen und ENTER drücken.
3. Über die Bild ab/Bild auf oder der Enter Tasten können Sie die Optionen ändern. Tun Sie dies nun indem Sie dem Eintrag Boot Sequence oder Boot Drive die Option CD-ROM oder D:\ (bzw. ein beliebiges Laufwerk) zuordnen. Ein Druck auf ESC bringt Sie ins vorhergehende Menü zurück.
4. Fahren Sie nun mit dem Cursor auf Save & Exit Setup und legen Sie die Windows XP Installations CD ins Laufwerk.
5. The setup program reports and a blue screen appears, which has a status bar with information at the bottom. This shows the drivers that are currently being loaded to ensure that your system is working properly.
6. Der Willkommensbildschirm wird sogleich mit einem Druck auf die ENTER Taste übersprungen, damit Sie sich im Auswahlmenü der Festplatten finden. Hier wird entschieden auf welchem Laufwerk Windows XP seinen Platz finden soll. In den meisten Fällen wird dies C:\ sein. Wählen Sie nun die beliebige Festplatte und drücken Sie Enter.
Note: Are you the proud owner of several partitions? Would you like to create one? Or do you want to delete one? Press the L key to perform the latter action - the data will be lost immediately. Use E to create a partition, the size of which you can adjust as required.
7. The next window gives you the choice between FAT and NTFS. I recommend formatting the hard disk in the New Technology File System due to the security functions and the improved speed. In addition to the information in the Windows Tweaks Lexicon about NTFS, you can also find some information about the file system in the Windows 2000 introductory article.
8. Die Festplatte wird formatiert und danach geprüft. Für den Falle, dass Windows XP Fehler entdeckt werden diese korrigiert und das Setup neugestartet.
9. Nun werden die Dateien kopiert, was seine Zeit dauern kann. Danach verlangt Windows XP einen Neustart und Sie finden sich nach diesem in einer mausgesteuerten bunten Installationsumgebung. Es wird nun versucht die Hardware zu erkennen - sobald dies beendet ist begrüßt Sie der sogenannte Installationsassistent noch einmal, was Sie mit einem Klick auf Weiter zur Kenntnis nehmen. Neben der Installation lobt sich XP selbst in die Höhe indem es einige Funktionen vorstellt.
10. Now enter your name and that of your company in the fields and confirm with Enter. The next window will ask you to choose a computer password and name your computer. Follow these prompts dutifully.
11. Ein Klick auf Weiter und der Assistent sucht nun nach Netzwerkkarten und Komponenten, was sehr lange dauert und den längsten Teil der Installation ausmacht.
12. Eine Meldung gibt ihnen nun Aufschluss über den Erfolg der Installation. Klicken Sie erleichtert auf Fertig stellen und sehen Sie zu, wie Windows XP zum ersten Mal hochfährt. Sobald das Betriebssystem geladen hat erscheint blauer Willkommensinstallationsbildschirm in welchem Sie zunächst ihre Internetverbindung einrichten können und dann ihre Benutzernamen eintippen sollen. Das erstere können wir getrost auf später verschieben!
13. Sobald Sie auf Fertig stellen geklickt haben, stehen Sie zum ersten Mal vor der bunten Oberfläche.
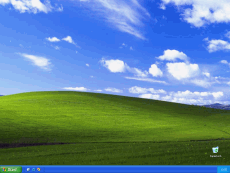
Herzlichen Glückwunsch! Die Windows XP Installation ist erfolgreich verlaufen.
Sie sollten sich jetzt den ersten grundlegenden Schritten der Geschwindigkeits und Stabilitätsoptimierung zuwenden.
![]()

On Windows Tweaks you will find time-saving tech guides for PC, software & Microsoft. For a stress-free digital everyday life. Already We have been tweaking Windows since 1998 and just don't stop!
