Quick overview:
Täglich erreichen mich Leserbriefe, die mit der Zeile "Ich wollte meinen Computer mal aufräumen und...naja....da hab ich wohl bisschen zu viel gelöscht. Jetzt fährt mein Windows nicht mehr hoch oder die Anwendung XY funktioniert nicht mehr! Hilfe!" beginnen. Überlassen Sie das Aufräumen einem Werkzeug, das weiß, was es tut. Diese Anleitung zeigt Ihnen, wie Sie mit TuneUp Ihre Festplatte und die Registrierungsdatenbank mal gründlichst aufräumen. [Von Sandro Villinger] Im Laufe eines "Windows-Lebens" sammelt sich eine Menge Datenschrott an, den Sie von Hand gar nicht mehr loswerden: Tausende "temporäre" Dateien (die beim Ausführen von Programmen genutzt und dann aus Schlampigkeit der Entwickler liegen gelassen wurden) oder Sicherungsdaten, die vom Betriebssystem erstellt werden. Dazu gesellen sich Registrierungseinträge, die nicht nur Platz, sondern auch gehörig Leistung schlucken! Kurzum: Ein "Spätjahrsputz" wird notwendig! Als Werkzeug verwenden wir dazu die TuneUp Utilities 2008. Und so geht's:
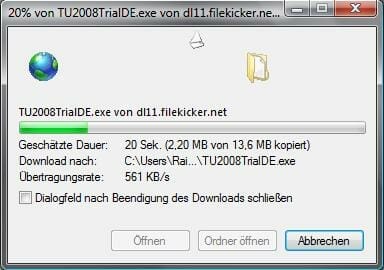
- Laden Sie sich die TuneUp Utilities von der Seite http://www.tuneup.de/download/tu2008/. Dazu müssen Sie einfach Ihre E-Mail-Adresse eintippen und auf "Download starten" klicken.

- Wechseln Sie jetzt in die Kategorie "Aufr�umen & Reparieren". Hier w�hlen Sie zun�chst den "TuneUp DiskCleaner". Best�tigen Sie die Beschreibung mit "Weiter". W�hlen Sie nun alle Laufwerke aus, die Sie bereinigen m�chten. Standardm��ig sind alle internen und externen Festplatten aber schon ausgew�hlt.

- Klicken Sie im Anschluss auf "Fertig stellen". W�hlen Sie nun in den TuneUp Utilities den "TuneUp RegistryCleaner". Nachdem Sie auch die Willkommensmeldung best�tigt haben, sollten Sie sich vergewissern, dass "Vollst�ndige Pr�fung (empfohlen)" ausgew�hlt ist. Hierbei wird die gesamte Registrierungsdatenbank auf Fehler und �berfl�ssige Eintr�ge �berpr�ft.

- Wenn Sie sich unsicher sind, k�nnen Sie die Listen durchgehen und kontrollieren, ob ein wichtiger Eintrag darunter zu finden ist. Wir testeten TuneUp 2007 auf vier Testrechnern und in keinem Fall hat TuneUp einen wichtigen Eintrag gel�scht. Tats�chlich werden nur Werte und Schl�ssel gel�scht, die vom System oder seinen Programmen nicht mehr notwendig sind. Best�tigen Sie nun mit
On Windows Tweaks you will find time-saving tech guides for PC, software & Microsoft. For a stress-free digital everyday life. Already we have been "tweaking" Windows since 1998 and just won't stop!


