Quick overview:
Windows 2000 already offered the option of integrating a service pack into an installation CD. This not only saves you the step of installing the SP later, but can also solve problems during setup from the outset, as the latest files are now also used during the Windows installation. History repeats itself, as this is also possible with Windows XP and its new SP1. With this newly burned CD, you then have a brand new version of XP and can leave your original CD on the shelf.
And this is how you proceed:
1. You must prepare the following:
- Download the Windows XP Service Pack 1 hiit down!
- We have provided you with the required boot file here provided.
- We work with Nero Burning Rome 5.5.
- Always have your original Windows XP CD-ROM ready
- You will need approx. 1000 MB of hard disk space and of course a CD burner.
2. Create a directory on your hard disk called WinXP and create three subfolders in it with the names CD, SP1Files and Bootfile.
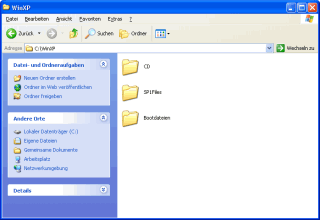
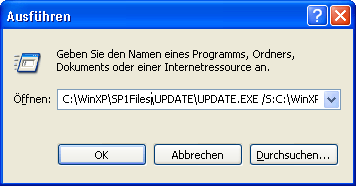
3. Now insert the Windows XP CD-ROM into your drive and copy all data into the folder WinXP\CD. Now pack the downloaded SP1 into the directory WinXP and name it in xpsp1 which is not necessary but serves the purpose of simplicity. Now click in the start menu on Execute and carry C:\WinXP\XPSP1.exe /x:C:\WinXP\SP1Files in. After clicking on OK starts the unpacking process in the SP1 directory. In our example, you have selected the drive C:\, whereby you must adjust the letter for other drives.
Create a working Windows XP ServicePack CD
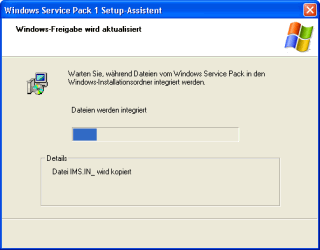
4. Now the Service Pack files must be merged with the XP CD files, which can be done using the command C:\WinXP\SP1Files\UPDATE\UPDATE.EXE -S:C:\WinXP\CD under Start/Execute is going on. Now extract the boot file.zip to the folder Boot filewhich you created.
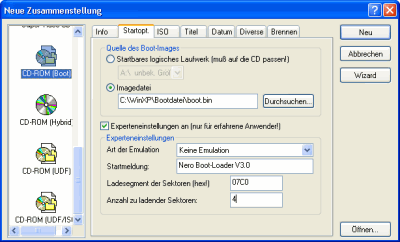
5. Now open the firing program Nero Burning Rome 5.5 and close the wizard that appears. In the left-hand selection list of the main window, select CD-ROM (boot) and make the following settings under Start opt. before:
- Select the "Image file" and enter the path "C:\WinXP\Bootdatei\boot.bin" under "Browse". First make the file visible under "File type with "All files.
- Under "Type of emulation" set to "No emulation" and in "Sector load segment" check whether "07C0" is present.
- The number of sectors to be loaded must be set to "4".
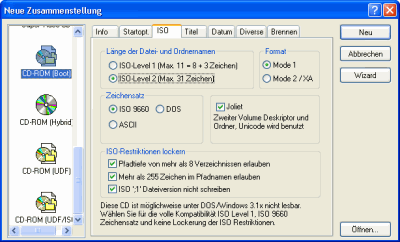
6. Now open thei tab ISO and activate ISO level 2 (max. 31 characters). The following settings must also be made:
- Mode 1 must be set under Format.
- The "character set must be set to "ISO 9660
- "Joliet absolutely must be activated.
- Under "ISO restrictions" all 3 options must be ticked.
7. In the tab "Title you must note that "ISO9660 was selected. Under "Designation you should enter the name of your XP CD, e.g. "WXPVOL_EN . The remaining fields can be left blank, whereby you must ensure that Use ISO9660 designations also for Joliet is activated. The original date should also be displayed via Use the date and time of the original file can be used! Finally click on Fix CD under Burning and finally select the button New.
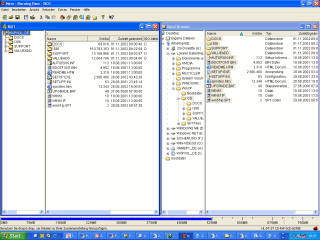
Here you move all files in the folder C:\WinXP\CD in the left-hand pane and wait for the loading process to complete.
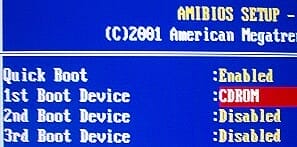
8. Now that this is complete, you can click on the CD burning and burn your ready-to-run XP Service Pack 1 Setup CD there. After the burning process, you must insert the CD and enter it in the BIOS under BIOS Features Setup the Boot Sequence on CD-ROM set. After saving and restarting, the installation program should start.
NOTE FOR NEW PUBLICATION: This article was produced by Sandro Villinger and comes from the Windows Tweaks archive, which has been built up since the late 1990s.

On Windows Tweaks you will find time-saving tech guides for PC, software & Microsoft. For a stress-free digital everyday life. Already We have been tweaking Windows since 1998 and just don't stop!