
Quick overview:
Viele Benutzer schrecken vor der Installation eines Betriebssystems mit kritischem Blick zurück. Mittlerweile sind aber diese Vorgänge sehr einfach und weitgehend problemlos gestaltet so dass sich auch Anfänger daran wagen. Wenn Sie nun noch diese Anleitung beachten kann nichts mehr schiefgehen.
The requirements for your computer
Windows Me stellt besonders an den Arbeitsspeicher hohe Ansprüche. Man sollte mindestens 128 Megabyte sein Eigen nennen, damit Freude bei der Arbeit aufkommt. Rechner mit lediglich 64 Megabyte oder weniger müssen Abstriche machen und Kompromisse eingehen. So empfiehlt es sich hier dann die neuen Funktionen auszuschalten damit Windows ohne Komplikationen und ausreichend schnell läuft.
Microsoft persönlich gibt ein Minimum von 32MB an, was ich für untertrieben halte.
Auch der Prozessor sollte einiges leisten können. Die offiziellen Minimalanforderungen in diesem Bereich liegen bei 133 Mhz wobei ich einen optimalen Betrieb erst ab 300 Mhz garantieren kann.
Im Handbuch von Windows Me steht geschrieben, dass mindestens 200 Megabyte auf der Festplatte frei sein sollten. Nach der Installation wundert man sich über einen auf 549MB geschwollenen Ordner und über eine Auslagerungsdatei von mehreren hundert Megabyte. Falls später auch noch Programme und Daten hinzukommen sollten Sie sich mindestens 1 GB Spielraum für Me selbst einrichten und alles darüber hinaus für die Programme.
If your computer meets these requirements, you can continue reading with peace of mind.
Clever use of the installation parameters
Die Windows Millennium Edition Installation lässt sich in vielen Möglichkeiten anpassen. Beispielsweise kann man entscheiden ob die Festplattenüberprüfung stattfindet oder die Einrichtung des Netzwerkes übersprungen wird. Wenn man die Installation auf herkömmliche Weise startet, erhält man die Chance zum Setzen dieser Einstellungen nicht welche über sogenannte Parameter erreicht werden. Die Benutzung dieser ist denkbar einfach:
1. Schalten Sie ihren Computer ein und drücken Sie direkt die ENTF oder F2 Taste um ins Grundprogramm (BIOS) des Computers zu gelangen. Die Tasten und einige Begriffe weichen möglicherweise ab - ein Blick ins Handbuch schadet in den wenigsten Fällen.
2. Sie sollten nun einen blau/gelben Bildschirm vor sich sehen in welchem Sie mithilfe des Cursors auf BIOS Features Setup gehen und ENTER drücken.
3. Über die Bild ab/Bild auf oder der Enter Tasten können Sie die Optionen ändern. Tun Sie dies nun indem Sie dem Eintrag Boot Sequence oder Boot Drive die Option CD-ROM oder D:\ (bzw. ein beliebiges Laufwerk) zuordnen. Ein Druck auf ESC bringt Sie ins vorhergehende Menü zurück.
4. Fahren Sie nun mit dem Cursor auf Save & Exit Setup und legen Sie die Windows Me Installations CD ins Laufwerk.
5. Nach einem Neustart erscheint der Willkommensbildschirm:
Microsoft Windows Me CD-ROM Startmenü
1. Von Festplatte starten
2. Von CD-ROM starten
You decide on number 2 and confirm this.
6. Der nächste Dialog fragt Sie nun:
1. Windows Setup von CD-ROM starten
2. Computer mit CD-ROM Unterstützung starten
3. Computer ohne CD-ROM Unterstützung starten
Here you decide on point 2 again and confirm your selection again.
7. Nach kurzer Zeit befinden Sie sich im DOS, einem schwarz/weissem Nichts, mit einem blinkenden Cursor hinter A:\>.
8. Tippen Sie den Buchstaben ihres CD-ROM laufwerkes ein. Beispielsweise E: und drücken Sie Enter. Sie befinden sich nun auf dem Laufwerk.
9. Geben Sie den Befehl setup gefolgt von den von ihnen gewünschten Parametern ein. Als Beispiel wenn man die Festplattenüberprüfung ablehnt und die Netzwerkkonfiguration überspringt bietet sich folgender Parameter an:
setup /iq /in
Hier finden Sie eine Liste von allen Parametern
| /PJ | This switch activates ACPI if you have problems with Advanced PowerManagement. |
| /PI | If you have an older bios and have problems with hardware detection, you can use these parameters to avoid problems. |
| /IQ | No cross-connected files are searched for during the Scandisk run at the start of the setup |
| /IN | Deactivates the setup of the network |
| /IR | This important switch allows you to keep your boot manager for new installations, which would otherwise be overwritten. |
| /NF | Deactivates the creation of a boot disk during setup. |
| /ID | The system does not check whether sufficient hard disk space is available for the installation. |
| /IS | Scandisk is not started at startup. If errors occur on a drive, Scandisk prevents the installation. |
| /IM | The working memory check is bypassed. |
| /NM | Win98 determines the system data and cancels the setup if your PC is below the minimum requirements. However, it is not recommended to install Windows on such slow PCs (under 486 with 66Mhz). You will hardly enjoy working with it. |
Die Installation mit vorhergehender Formatierung der Festplatte
Falls Sie ihr altes Betriebssystem mitsamt allen Daten weg haben möchten um sozusagen ein jungfräuliches Windows Me auf die Beine zu stellen müssen Sie die Festplatte formatieren. Und so gehen Sie dabei vor:
1. Befolgen Sie genau die Schritte 1-8 von Die Installationsparameter geschickt nutzen.
2. Tippen Sie nun cd win9x ein und bestätigen Sie dies mit einem Druck auf die ENTER Taste.
3. Tragen Sie jetzt den Befehl format c: ein und teilen Sie der Warnung mit J mit, dass Sie es todernst meinen. Die Formatierung, welche je nach Größe des Datenträger, sehr lange gehen kann nimmt ihren Lauf.
4. At the end you will be asked for a hard disk name, which may be a maximum of 11 characters long.
5. Tippen Sie jetzt setup ein (Sie können auch die Parameter nun benutzen, wenn Sie möchten) um die Installation endlich in Gang zu setzen.
6. The computer is now checked for performance and the hard disk is checked one last time so that Windows can be installed optimally.
7. Sie werden nun von dem Installationsassistenten herzhaft begrüßt, welcher Sie durch den weiteren Vorgang schleusen wird. Auch das dazugehörende Willkommen und der ellenlange Text sollte mit Weiter übersprungen werden. Markieren Sie im nächsten Dialogfeld den Eintrag Ich stimme dem Vertrag zu und tippen Sie ihre Windows Me Serialnummer in die 5 Blöcke ein. Der Cursor springt im übrigen automatisch ins nächste Feld.
8. Nun stehen Sie vor der Qual der Wahl mit der Installationsart. Ich empfehle selbst Anfängern Benutzerdefiniert zu wählen damit Sie nichts überflüssiges installieren, was sie ohnehin nicht brauchen. Vorher wird man noch nach dem Namen und der Organisation gefragt, was man ehrlich beantwortet.
9. The next window is all about the computer name, the workgroup and its description. This is only of interest and importance in the network.
10. The next windows deal with the language, which only includes the date, time, currency and keyboard layout, as well as creating a boot disk, which you can safely skip.
11. A confirmation with Finish starts the Windows copying process. You may get scared at 10% because the process stops here. I can reassure you - after the longer pause, it continues quickly and smoothly.
12. Sobald das Kopieren der Dateien vollendet ist verlangt Windows Me nach einem Neustart den Sie auch erlauben. Drücken Sie nun direkt wieder ENTF oder F2 um wie weiter oben beschrieben ins BIOS zu gelangen. Stellen Sie nun die Boot Sequence von CD-ROM wieder auf C only oder IDE-0 damit der Rechner nicht mehr nach Installations CDs sucht.
13. The installation wizard suddenly pops up again and explains its intention. It installs all device drivers and requests a reboot in between before getting down to business - namely the Windows settings and completing the installation.
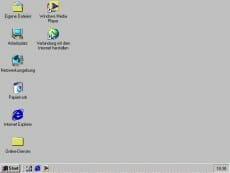
13. Ein letzter Neustart und Sie stehen vor ihrem neuen Microsoft Windows Millennium Edition Betriebssystem. Die Frage nach dem Kennwort können Sie getrost mit OK bestätigen. Sie werden daraufhin nicht mehr damit geärgert. Zum ersten Male haben Sie den Desktop, die Oberfläche von Me, vor sich:
Nach dieser geglückten Installation sollten Sie mit dem nächsten Kapitel Erste Schritte zur Performance und Stabilitätsverbesserung anfangen.
NOTE FOR NEW PUBLICATION:This article was produced by Sandro Villinger and comes from the Windows Tweaks archive, which has been built up since the late 1990s.

On Windows Tweaks you will find time-saving tech guides for PC, software & Microsoft. For a stress-free digital everyday life. Already We have been tweaking Windows since 1998 and just don't stop!
